This post may contain affiliate links. Please see our disclosure policy.
Tired of spending money on store-bought Magic Erasers filled with unknown chemicals? Good news—you can make a DIY Magic Eraser with just a few simple ingredients you probably already have at home!
These homemade cleaning tools are just as effective at removing scuffs, grime, and stains from surfaces, but without the harsh chemicals or high cost. In this post, I’ll show you how to create your own eco-friendly, budget-friendly Magic Erasers, so you can keep your home clean while staying mindful of your health and the environment.
Check out my DIY Magic Eraser on my Instagram!

❤️ Why You’ll Love
You’ll love making your own DIY Magic Erasers because they’re not only incredibly easy to put together, but also highly effective at tackling tough stains, grime, and scuffs. Plus, they’re completely non-toxic and safe to use around kids and pets—giving you peace of mind while cleaning.
With just a few common household ingredients, you can create a powerful cleaning tool without relying on expensive, chemical-filled store-bought products. Whether you’re cleaning up crayon marks, kitchen grease, or soap scum, these DIY Magic Erasers will help you keep your home spotless and eco-friendly, all while saving money!
🧽 Materials
To make your own DIY Magic Eraser, you only need a few simple materials that you likely already have at home. A basic sponge works great as the base, but a cloth can do the trick too!
The key ingredient here is baking soda, a natural, non-toxic cleaner that helps lift stubborn dirt and stains. To make the eraser even more effective, you can add a few drops of dish soap to cut through grease and grime.
All of this comes together with just warm water to create a powerful, chemical-free cleaning solution that’s safe for your home and family!
🧼 How to Do
Making your own DIY Magic Eraser is incredibly simple and only takes a few minutes! Start by mixing 1 tablespoon of
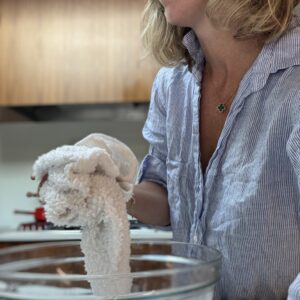
Next, soak your sponge or cloth in the mixture for about a minute. Gently squeeze out any excess liquid so the sponge is damp, not soaking.
Now, you’re ready to clean! Use the sponge to scrub away dirt, stains, or scuff marks from various surfaces. When you’re done, rinse it out and let it dry for future use. It’s an easy, effective, and non-toxic way to keep your home spotless!
🪄 Tips and Tricks
To get the most out of your DIY Magic Eraser, there are a few tips and tricks that can make cleaning even more effective! First, always start by testing the eraser on a small, inconspicuous area, especially on painted or delicate surfaces, as the sponge can be slightly abrasive. When cleaning stubborn stains, use gentle, circular motions to avoid damaging the surface. If you’re tackling tougher grime, like grease or bathroom soap scum, try adding a few extra drops of dish soap to the mix for additional scrubbing power.
After each use, rinse your sponge well and let it dry thoroughly to prevent any odors or mildew from developing. Also, remember that while this DIY eraser works wonders on most surfaces, it’s best to avoid using it on shiny or easily scratched materials like stainless steel or high-gloss finishes. With these tips in mind, you’ll keep your DIY Magic Eraser working efficiently for all your household cleaning needs!
🗒 Variations
If you’re tackling extra stubborn stains, add 2 tablespoons of
For really greasy surfaces, mix in a little white vinegar with the water and
🫙 How to Store
Properly storing your DIY Magic Erasers ensures they stay fresh and ready to use for future cleaning tasks. After each use, be sure to rinse the sponge thoroughly with water to remove any dirt or cleaning residue. Gently squeeze out the excess water and allow the eraser to air dry completely before storing, as this helps prevent mold or mildew from forming.
You can store your dried Magic Erasers in an airtight container or a zip-top bag to keep them clean and free from dust. For convenience, consider keeping them near your usual cleaning supplies, so they’re always within easy reach when you need a quick scrub.
With these simple storage tips, your DIY Magic Erasers will last longer and remain as effective as the day you made them!
🤔 Common Questions
Magic Erasers work well on a variety of surfaces, including walls, floors, baseboards, tiles, bathtubs, and appliances. They are particularly useful for removing scuff marks, stains, and grime. However, they can be abrasive, so it’s best to avoid using them on delicate surfaces like glossy paint, polished finishes, or wood surfaces.
Magic Erasers can be a little too abrasive for some paints, especially flat or matte finishes. If you’re using them on painted walls, test a small, inconspicuous area first to ensure they don’t remove or dull the paint. High-gloss or semi-gloss finishes are more durable and can typically handle a Magic Eraser.
You can use Magic Erasers as often as needed, but remember that they are abrasive and work by physically removing dirt and stains. This means that frequent use on certain surfaces (like walls or delicate materials) could eventually wear them down or leave behind light scratches.
DIY Magic Eraser
Ingredients
- 1 sponge or cloth
- 1 tablespoon of baking soda
- 1 cup of warm water
- A few drops of dish soap, optional, for extra cleaning power
Instructions
Prepare the solution
- In a small bowl, combine 1 cup of warm water with 1 tablespoon of baking soda. Stir well to dissolve the baking soda.
Add dish soap (optional)
- If you’d like a bit more scrubbing power, you can add a few drops of dish soap to the mixture. This step is optional but works well for tougher stains.
Soak the sponge
- Submerge the sponge into the solution, letting it soak up the mixture for about a minute.
Squeeze out excess liquid
- Remove the sponge from the solution and gently squeeze it to remove any excess liquid. You want the sponge to be damp, not dripping.
Use as a Magic Eraser
- Use the damp sponge to scrub away dirt, grime, or marks. The combination of the sponge texture and the non-toxic solution will lift stains and dirt effectively.
Rinse and reuse
- After using your DIY Magic Eraser, rinse the sponge thoroughly with water and let it air dry. You can reuse it multiple times!